

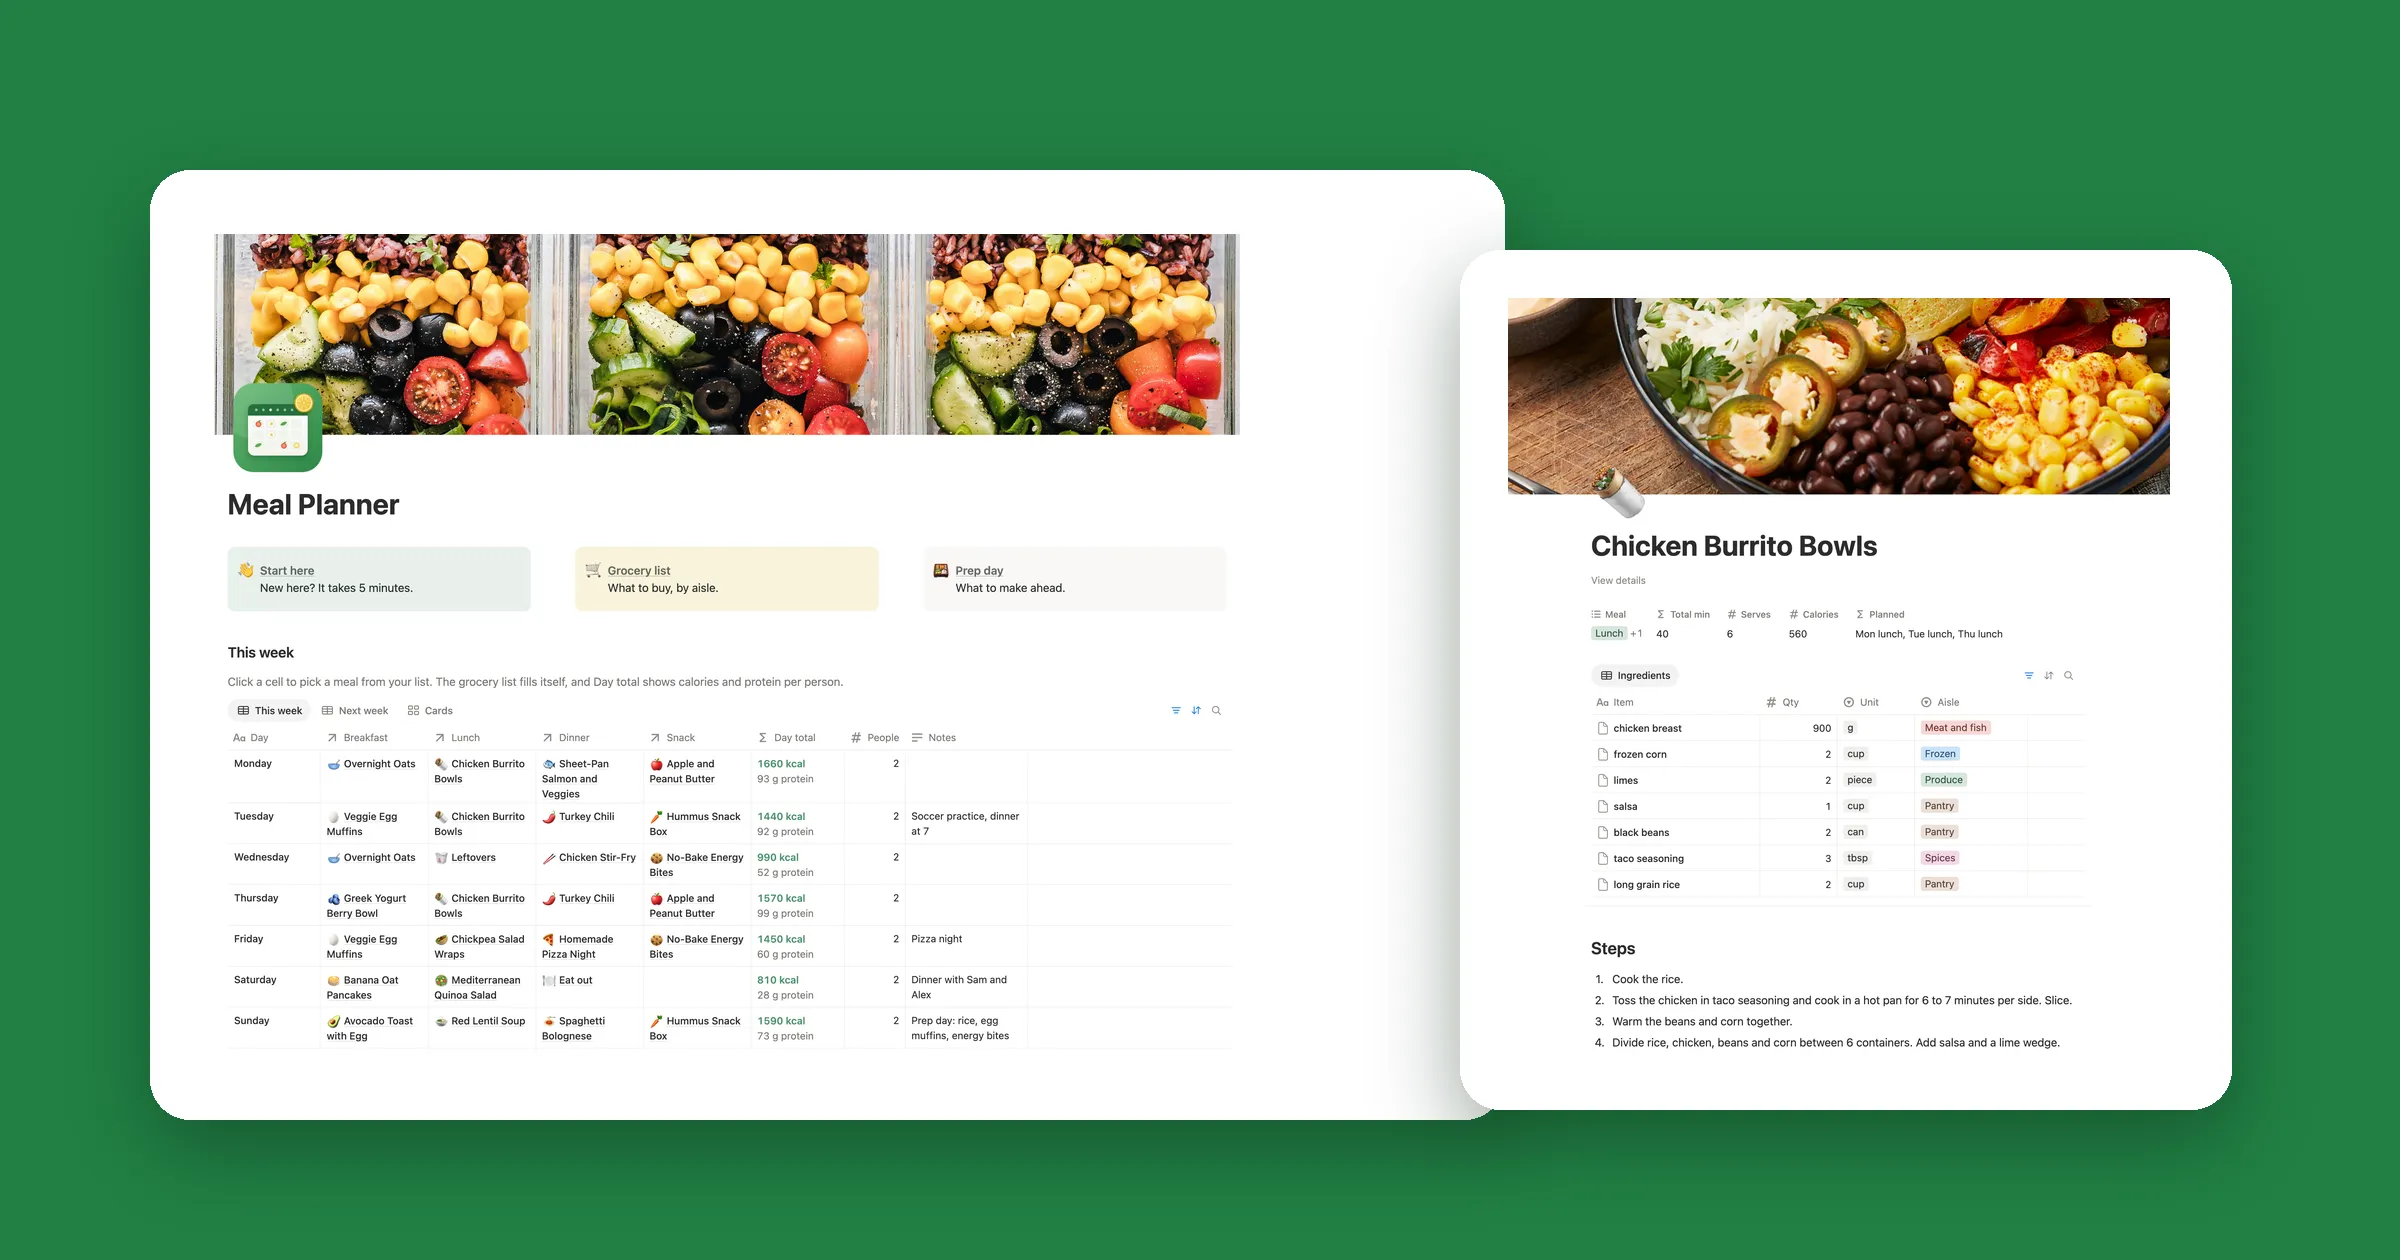

Try it: plan a week
Click a meal to put it on a day, and click it again to take it off. Each day’s calories and the shopping list change as you go, the same way the formulas below work in Notion. The week starts with the days we planned in our test.
This week
6 meals planned, 9 things to buy
- Mon 870 kcal
- Tue 990 kcal
- Wed 520 kcal
- Thu 0 kcal
- Fri 0 kcal
- Sat 640 kcal
- Sun 0 kcal
Shopping list
Dairy
- Milk 400 ml Overnight oats
- Parmesan 40 g Tomato pasta
Meat
- Chicken breast 300 g Chicken salad
Pantry
- Rolled oats 100 g Overnight oats
- Pasta 200 g Tomato pasta
- Tomato sauce 2 jars Tomato pasta
Produce
- Banana 2 Overnight oats
- Lettuce 2 heads Chicken salad
- Cherry tomatoes 200 g Chicken salad
1. Meals and their ingredients
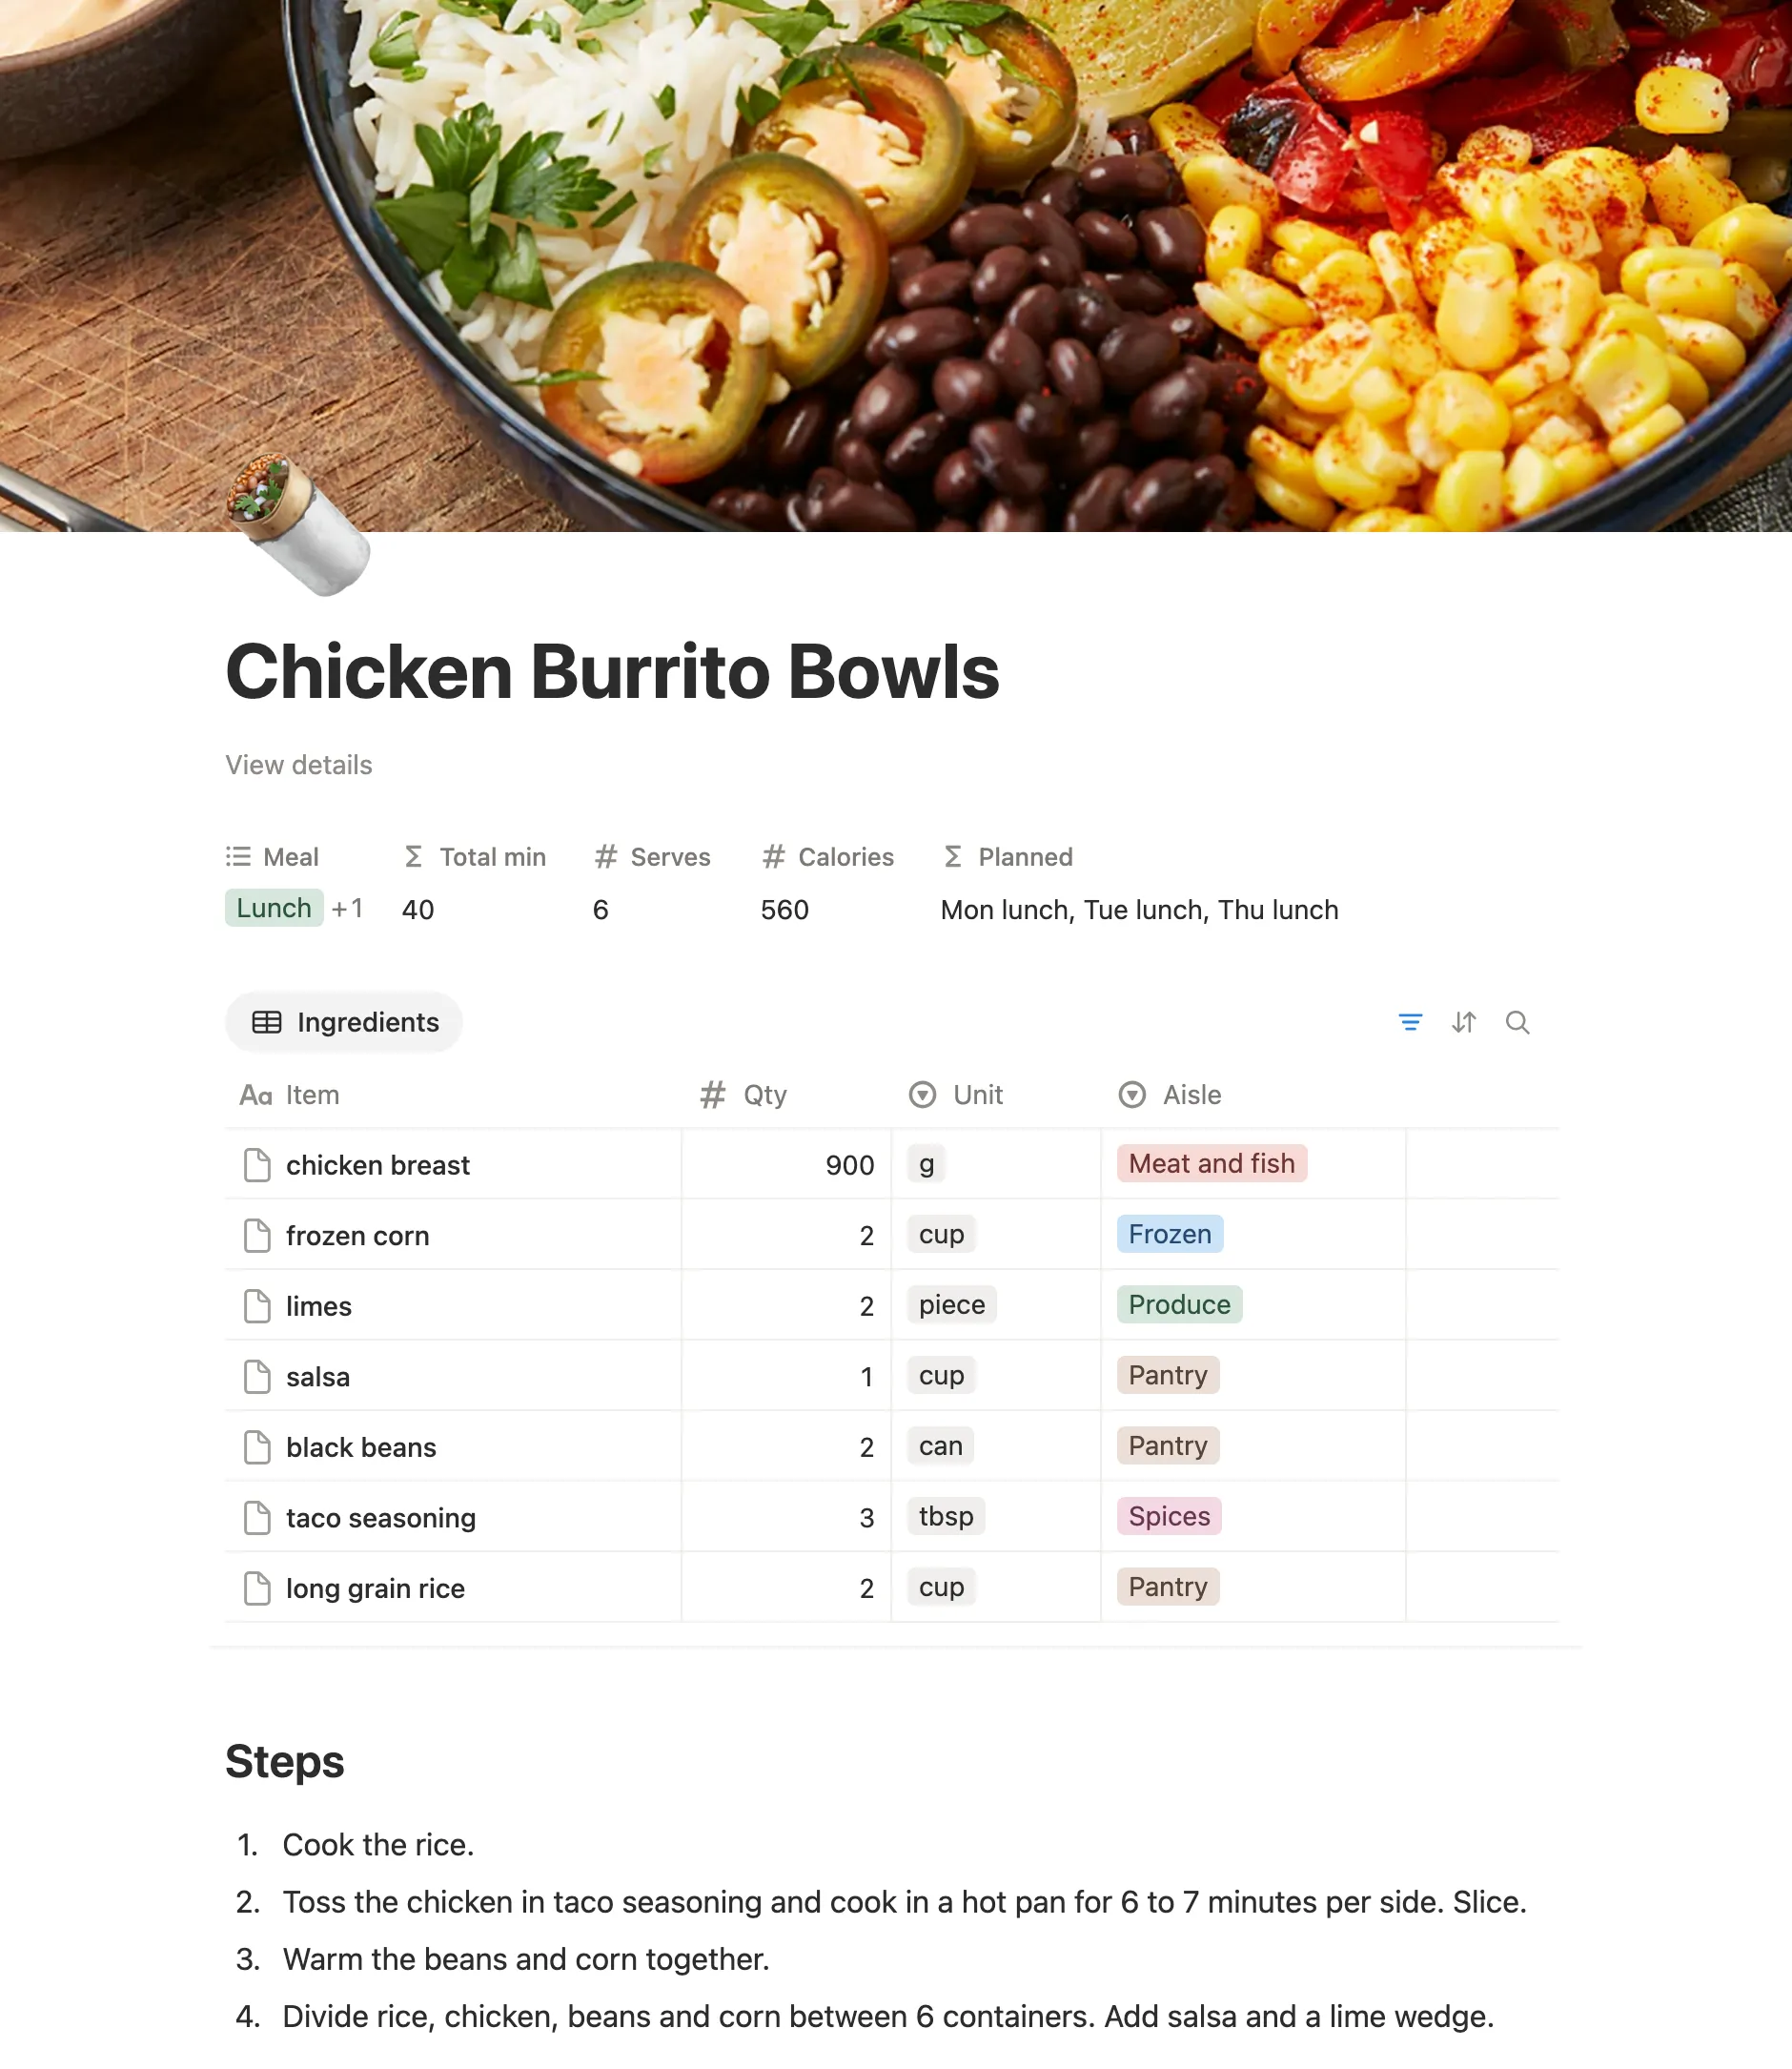
The trick is to give ingredients a database of their own, one row each, linked to the meal they belong to. That’s what lets Notion add them up for you later.
- Make a new page called Meal planner. On it, type
/table, pick the table option and call the database Meals. Add a Number property called Calories. - Add a second database called Ingredients with the properties below.
| Property | Type | What it’s for |
|---|---|---|
| Item | Title | What to buy, like Pasta |
| Qty | Number | How much one meal needs |
| Unit | Text | g, ml, can, jar |
| Aisle | Select | Produce, Meat, Dairy, Pantry |
| Meal | Relation | The meal it’s for |
When you add the Meal relation, pick the Meals database, turn on Show on Meals and name it Ingredients. Now every meal page shows what goes into it.
Type Qty for the amount you cook at once. If you cook for four, type amounts for four.
2. Plan the days
- Add a third database called Days with a Date property.
- Add a Relation called Meals. Pick the Meals database, turn on Show on Meals and name it Days.
- Add a page for each day you plan, set its Date and pick its meals. Sort the table by Date so the week reads top to bottom.
To see each day’s calories, add a Rollup property to Days called Calories. Set Relation to Meals, Property to Calories and Calculate to Sum. In our test, a Monday with Overnight oats at 350 and Chicken salad at 520 showed 870.
3. Count this week’s meals
On Meals, add a Formula property called This week. It counts the days from this Monday to this Sunday that the meal is planned for:
let(
  monday, dateSubtract(today(), day(today()) - 1, "days"),
  prop("Days").filter(
    dateBetween(current.prop("Date"), monday, "days") >= 0 and
    dateBetween(current.prop("Date"), monday, "days") <= 6
  ).length()
)
On Saturday, October 31, Tomato pasta was planned for Tuesday, Saturday and the next Monday. This week showed 2, since that Monday belongs to next week.
4. A grocery list that adds itself up
On Ingredients, add a formula called Buy. It multiplies what one meal needs by the number of times the meal is planned:
prop("Qty") * prop("Meal").first().prop("This week")Pasta at 100 g, for a meal planned twice, showed 200. Coconut milk, for a curry we didn’t plan, showed 0. Now turn it into a list:
- Click + next to the view name, add a Table view and call it Shopping list.
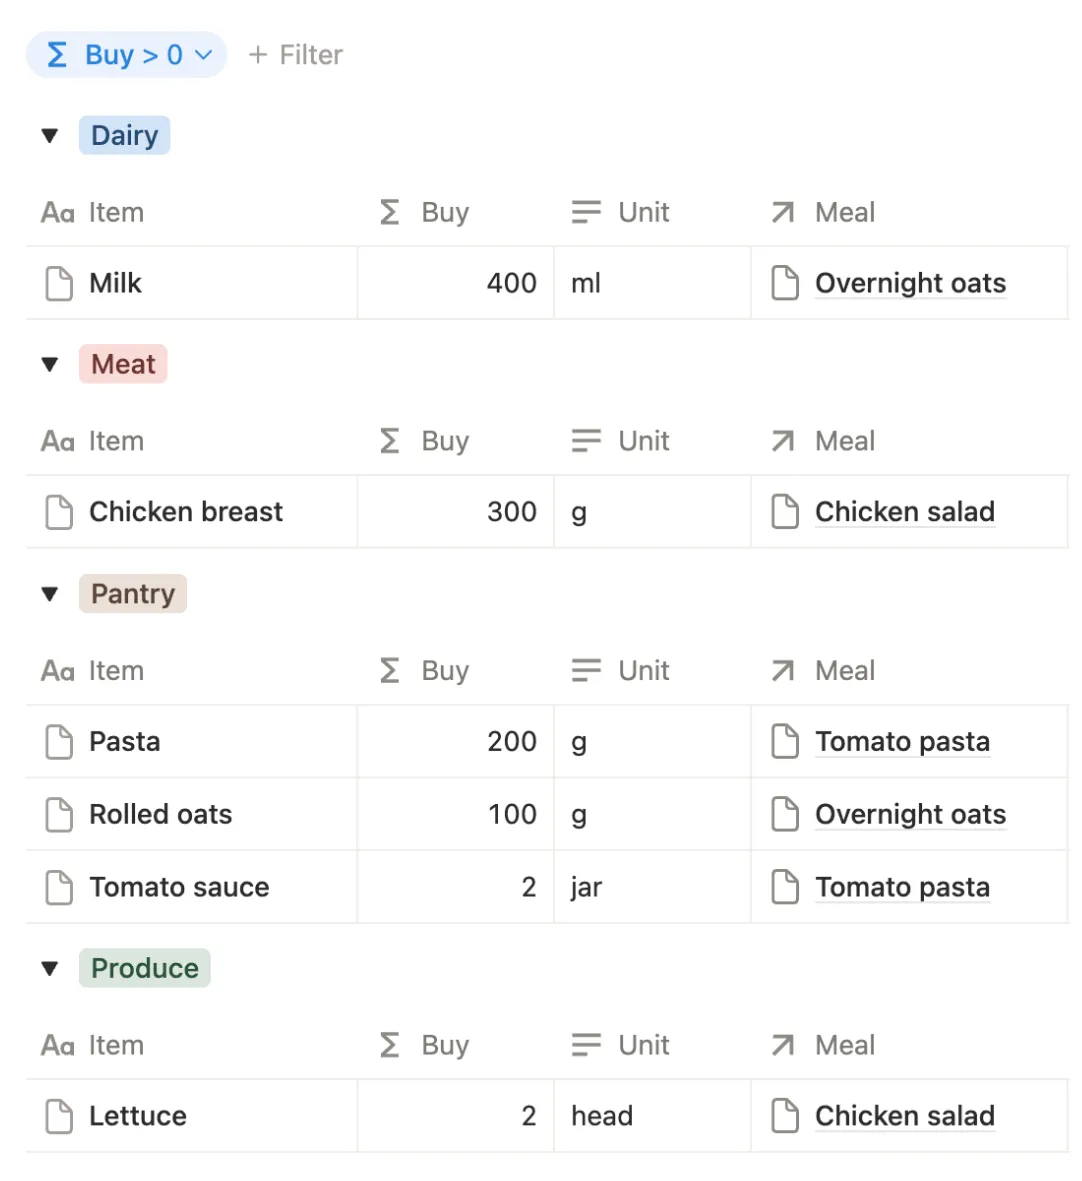
- Click Filter and choose Buy. Change = to > and type 0. Items for meals you didn’t plan drop off.
- Open the view’s settings, choose Group and pick Aisle, so the list follows the store.
Want to tick things off at the store? Add a Checkbox called Got it and filter the view to Got it is unchecked too. Our guide to resetting checkboxes has a button that unticks them all for the next shop.